Docs & Changelog
Guides, API reference, and versioned release history.
Nexspence manages Maven, npm, PyPI, Docker, OCI artifacts, Go modules, NuGet, Cargo, Helm, Apt, Yum/RPM, Conan, Raw, Conda and Terraform packages from a single self-hosted registry. Repositories can be Hosted (your published artifacts), Proxy (cached remote registries) or Group (multiple repositories under one URL).
This documentation covers Quick Start, Installation, Repositories, per-format guides, Browse & Search, Users, Roles & Privileges (RBAC), Cleanup policies, Webhooks, Migration from Nexus, Monitoring, Build Promotion, Replication, and the full REST API reference.
Get started in under two minutes with Docker Compose: download the latest release, set a strong admin_password and jwt_secret in config.yaml, then run docker compose up -d and open the UI at http://localhost:8081.
Source code (zip) archive and unpack it.config.yaml.example → config.yaml and set a strong admin_password and jwt_secret.docker compose up -d — waits for PostgreSQL, runs migrations, serves the UI at http://localhost:8081.admin123 / the example jwt_secret) unless auth.allow_insecure_defaults: true is set. The dev compose sets this so the quick-start boots; for production set a real admin_password and jwt_secret (e.g. via NEXSPENCE_AUTH_JWT_SECRET) instead.ghcr.io/nexspence/nexspence:latest — linux/amd64 and linux/arm64. Download the release zip from GitHub Releases.config.yaml.example → config.yaml. Set auth.jwt_secret (min 32 chars) and bootstrap.admin_password.| Service | URL | Default credentials |
|---|---|---|
| Web UI & REST API | http://localhost:8081 | admin / admin123 |
| Docker registry | localhost:5000 | same |
| PostgreSQL | localhost:5437 | nexspence / nexspence |
| MinIO console | http://localhost:9001 | minioadmin / minioadmin |
config.yaml: redis.enabled: true and redis.addr: "redis:6379". Two stateless Nexspence nodes behind nginx (least_conn) — shared state in PostgreSQL, Redis, and MinIO.deploy/monitoring/prometheus-token.Pre-configured Keycloak dev instance with the nexspence realm imported. "Sign in with Keycloak" appears on the login page automatically. Supports Keycloak, Google, Entra ID, and Okta.
redis.enabled: true and redis.addr: "redis:6379"nxs_* API token in Security → API Tokens, then paste it into deploy/monitoring/prometheus-token.deploy/helm/nexspence/. Run helm dependency update first to fetch the PostgreSQL sub-chart.nexspence-tls in the namespace.Every key can be overridden via env var: NEXSPENCE_<SECTION>_<KEY> (uppercase, underscore-separated).
| Key | Default | Description |
|---|---|---|
auth.jwt_secret | — | Required. JWT signing key — min 32 chars |
auth.encryption_key | — | Optional base64 32-byte key for replication credentials — decouples them from jwt_secret; existing rows re-encrypt automatically at startup. Generate: openssl rand -base64 32 |
bootstrap.admin_password | admin123 | Change before production. Auto-created admin password |
bootstrap.enabled | true | Create the admin account on start. Set to false once real accounts exist — the admin_* keys can then be removed from the config entirely |
http.addr | :8081 | Listen address |
http.base_url | http://localhost:8081 | Public URL used in download links |
auth.jwt_expiry_hours | 24 | JWT token lifetime |
auth.token_max_days | 180 | Max lifetime for user API tokens (nxs_*) |
auth.anonymous_enabled | true | Allow unauthenticated read on public repos |
storage.default_type | local | local, s3 or azure |
storage.s3.endpoint | — | S3 endpoint URL (e.g. http://minio:9000) |
storage.s3.bucket | — | S3 bucket name (required when type=s3) |
storage.s3.force_path_style | true | Required for MinIO / non-AWS S3 |
storage.s3.skip_tls_verify | false | Accept an unverifiable TLS certificate — for an on-prem S3 behind a private CA. Blob stores created in the UI carry the same option per store. |
storage.azure.container | — | Azure blob container (required when type=azure); must already exist |
storage.azure.account_name | — | Storage account; pair with account_key, or leave all credentials empty for the host's Entra ID identity |
redis.enabled | false | Enable Redis (required for HA) |
redis.addr | localhost:6379 | Redis address |
cleanup.default_schedule | 0 2 * * * | Default cron for cleanup policies |
gc.enabled | true | Run scheduled blob garbage collection |
gc.schedule | 0 3 * * 0 | Cron for blob GC (weekly by default) |
gc.min_age | 24h | Grace period — only collect orphans older than this |
audit.retention_days | 90 | Audit log partition retention |
http.cors_origins | [] | Allowed CORS origins; empty = same-origin / wildcard dev default |
http.max_body_mb | 1024 | Max request body in MB; bodies above it get 413 (artifact/upload routes exempt) |
auth.allow_insecure_defaults | false | Allow dev-default secrets; must be false in production or the server refuses to start |
auth.rate_limit_enabled | false | Enable per-IP / per-user rate limiting |
CREATE and CONNECT privileges on the target database..deb (Debian/Ubuntu) or .rpm (RHEL/Fedora/SUSE) package for your architecture (amd64 or arm64).nexspence system user and installs a systemd unit./etc/nexspence/config.yaml, then enable and start the service.Installed from a .tar.gz instead of a package? Create the unit manually:
systemctl enable --now nexspence.nexspence_*_darwin_amd64.tar.gz (Intel) or nexspence_*_darwin_arm64.tar.gz (Apple Silicon) from the release page. Extract and move the binary to /usr/local/bin/.com.nexspence.server.plist launchd agent. Load it with launchctl.The bundled plist looks like this — adjust paths if you installed elsewhere:
nexspence_*_windows_amd64.zip from the release page. Extract to C:\Program Files\Nexspence\.packaging\windows\install-service.ps1 from an elevated PowerShell to register and start Nexspence as a Windows service.Prefer NSSM for restart handling, log files and a clean stop signal:
sc.exe so it survives logoff, auto-starts on boot, and restarts on crash.X-Forwarded-* headers, and serve a clean public URL. Set http.base_url in config.yaml to the public HTTPS URL so download links are correct.upstream or a cloud LB. Enable redis.enabled: true for distributed session caching.<repo>.registry.example.com) you need wildcard DNS pointed at your server, a wildcard TLS certificate, and a reverse proxy that forwards the original Host header so the subdomain connector can route the request to the correct repository. Enable the connector in config.yaml:server_name to match all repository subdomains and proxy them to Nexspence, preserving the Host header:docker login repo-name.registry.example.com targets that hosted repository directly — no port or path prefix needed.Artifact storage is never rewritten by an upgrade: local blob directories and S3 buckets are read and written in the same layout across releases. Skipping versions is supported — migrations from every intermediate release run in order. Read the release notes for each version you skip; anything needing a manual step is called out there.
If the compose file pins a tag, edit it to the new version first. With :latest or a NEXSPENCE_VERSION variable, pulling is enough.
Named volumes carry the blob store and the generated JWT secret across the replacement, so no data or session state is lost. PostgreSQL in the same compose file is untouched by the pull.
Recreate the container from the new image with the same volumes, environment and database. Keeping the volume mounts identical is the whole trick — the container is disposable, its volumes are not.
Each release publishes a chart version matching the app version. --reuse-values keeps your existing overrides; drop it and pass your values file if you prefer an explicit upgrade.
With more than one replica, the first new pod to become ready runs the migrations while old pods still serve traffic. Additive migrations tolerate that overlap; when release notes flag a schema change as breaking, scale to one replica for the upgrade. helm rollback nexspence -n nexspence reverts the workload — but see Rolling Back below, because the schema does not revert with it.
Package upgrades replace the binary and leave /etc/nexspence/config.yaml, the nexspence system user and /var/lib/nexspence as they are. New configuration keys always ship with defaults, so an untouched config keeps working.
The service registration and C:\ProgramData\Nexspence\config.yaml survive the replacement — only the executable changes. Re-run install-service.ps1 only if the service itself is missing.
The running version also appears under System Admin → Info and at the bottom of the sidebar. The startup log line migrations OK confirms the schema is current; a failure there stops the server before it serves a single request, so a silent half-migrated state is not a state you can reach.
uid 1000, but blob volumes created by older root-running images are owned by root. Fix ownership once before starting the new image, otherwise Nexspence cannot write to its blob store.Fresh installs and S3 blob stores are unaffected. After the chown, start the stack normally with docker compose up -d.
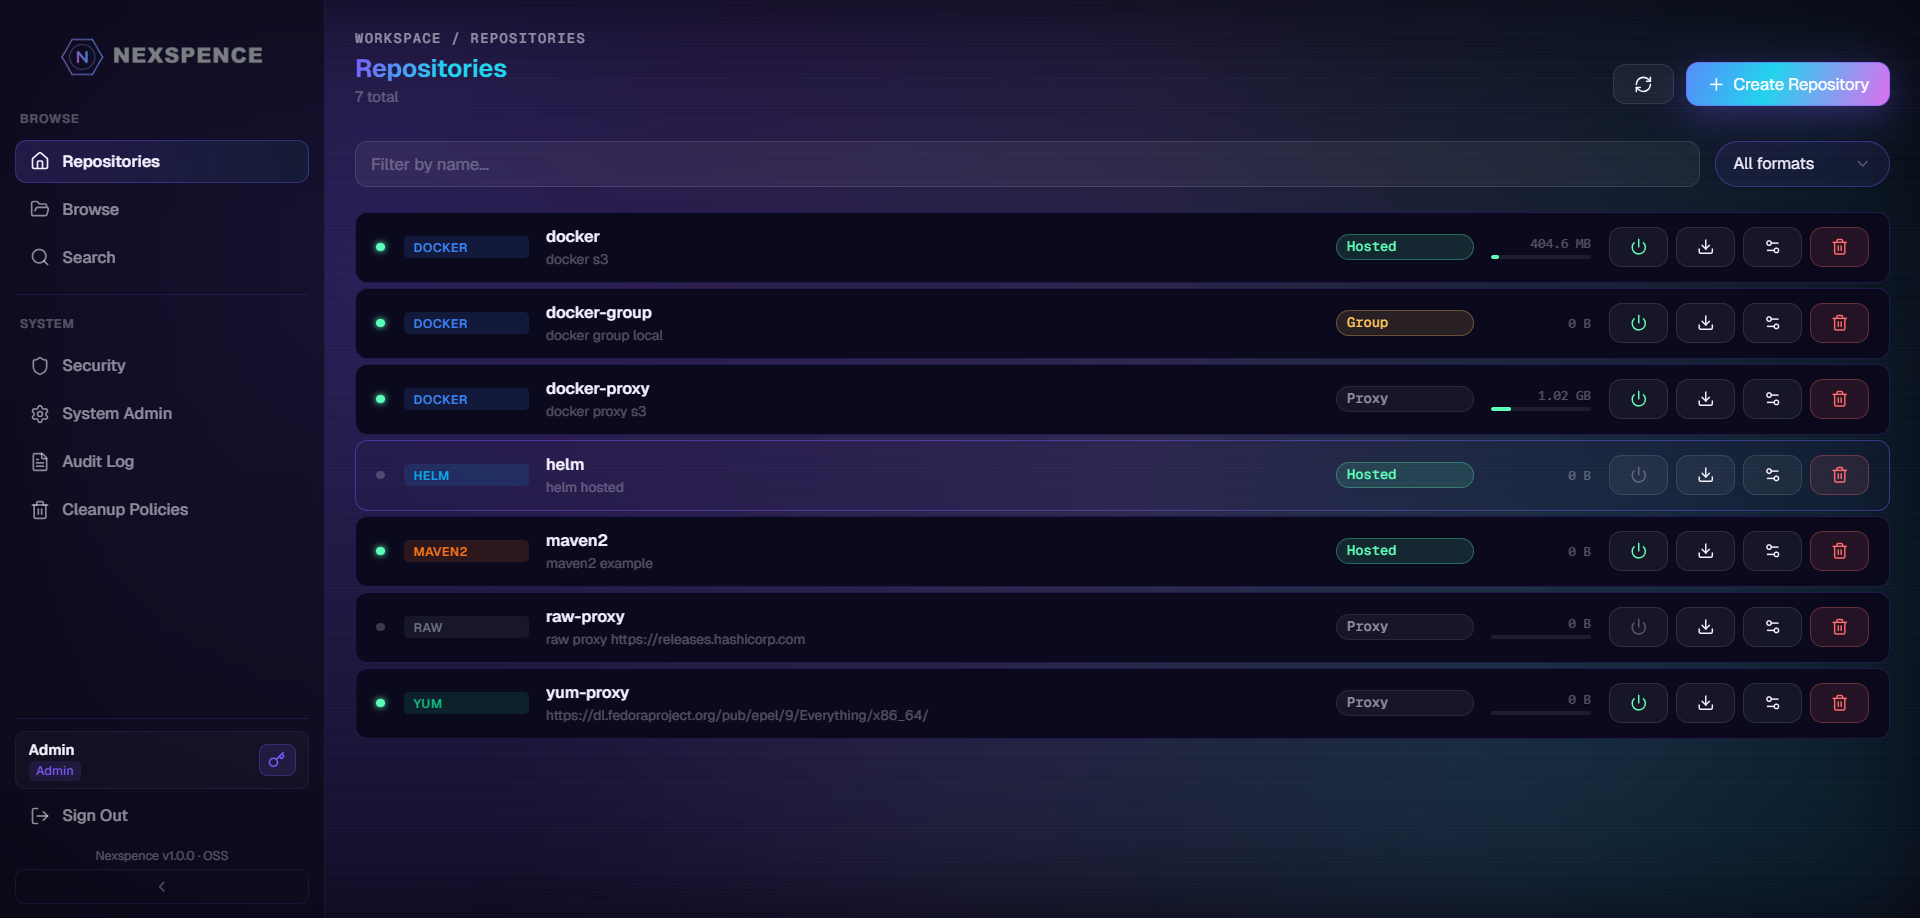
https://registry.npmjs.org). For Group: select member repositories in order. For all types: optionally assign a blob store and cleanup policy.http://localhost:8081/repository/{name}/. Point your build tool at this URL.| Format | URL pattern | Notes |
|---|---|---|
| Maven | /repository/{name}/ | Use as <url> in pom.xml or settings.xml |
| npm | /repository/{name}/ | Use as registry in .npmrc |
| PyPI | /repository/{name}/simple/ | Use as index-url in pip.conf |
| Docker | localhost:5000/{name} | Registry port 5000, image name includes repo |
| Helm | /repository/{name}/ | Add with helm repo add |
| Go | /repository/{name}/ | Set as GOPROXY |
| NuGet | /repository/{name}/index.json | v3 flat container endpoint |
| Cargo | /repository/{name}/ | Sparse index endpoint |
| RubyGems | /repository/{name}/ | Compact index + gem push |
| Raw | /repository/{name}/ | PUT/GET any path |
localhost:8081 with your server URL and {repo} with your repository name.Add Nexspence as a mirror in ~/.m2/settings.xml to route all dependency downloads through your proxy repository.
_auth is base64 of username:password. Generate: echo -n "admin:admin123" | base64. To publish: npm publish --registry http://localhost:8081/repository/npm-hosted/"insecure-registries": ["localhost:5000"] to Docker daemon config (/etc/docker/daemon.json) when using HTTP. Restart Docker after.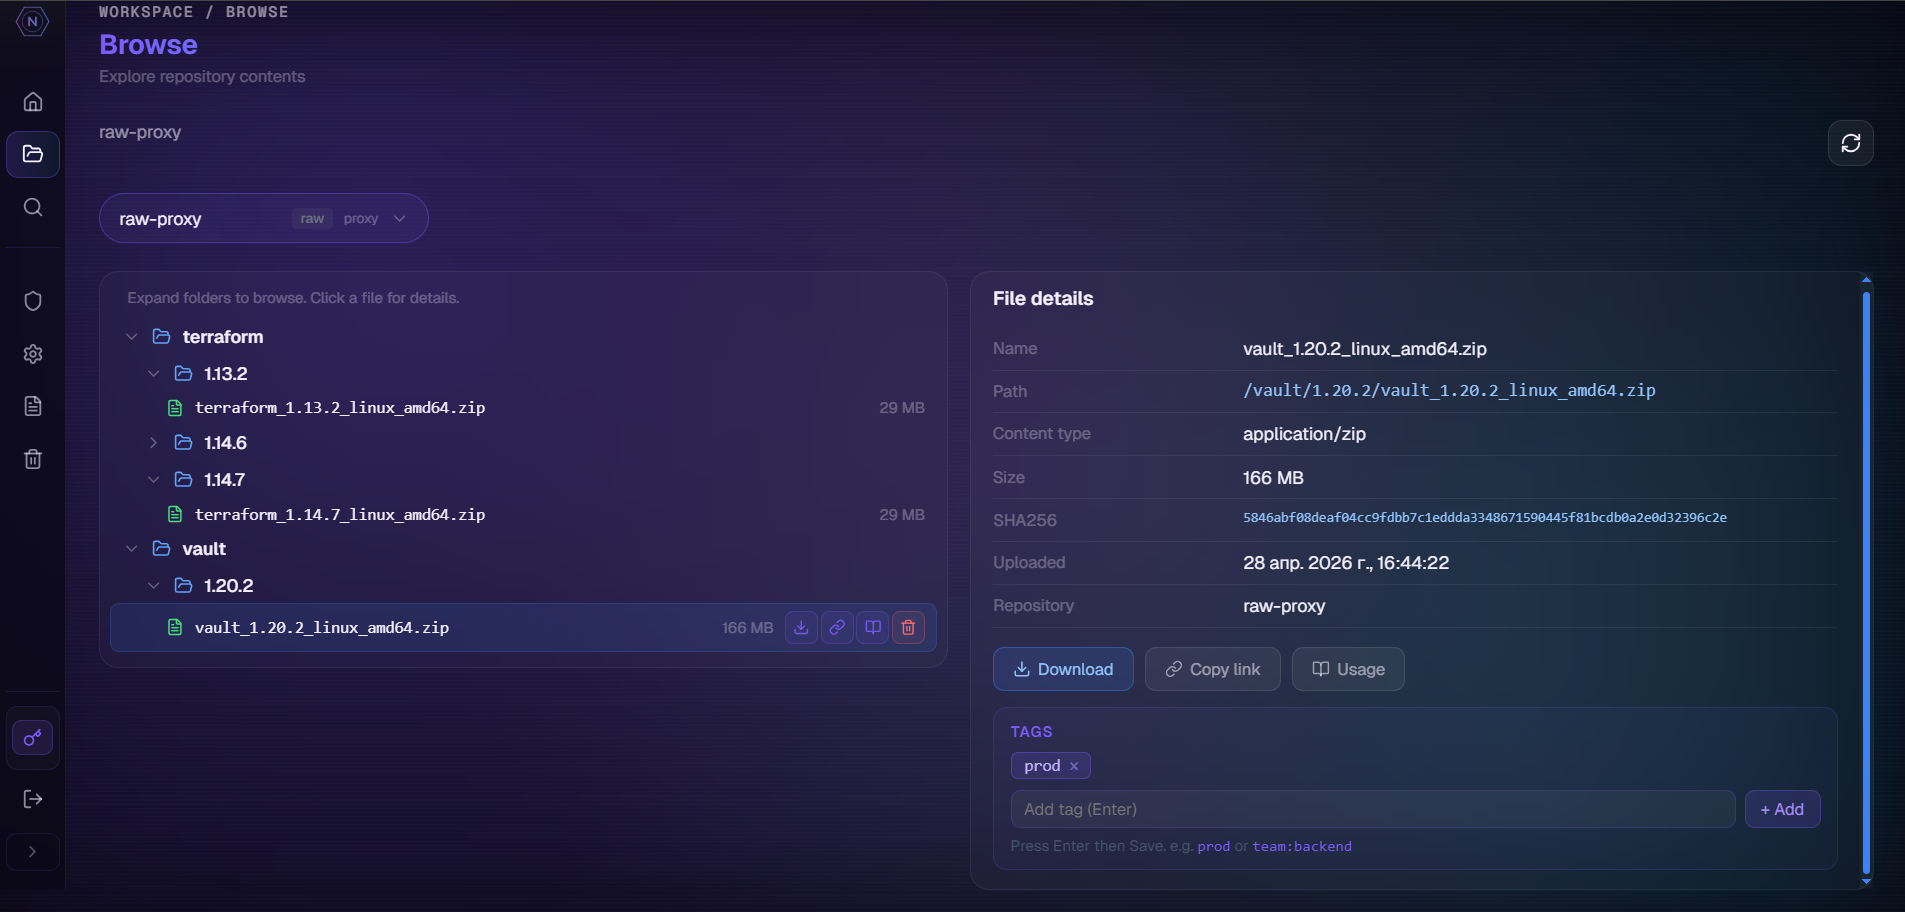
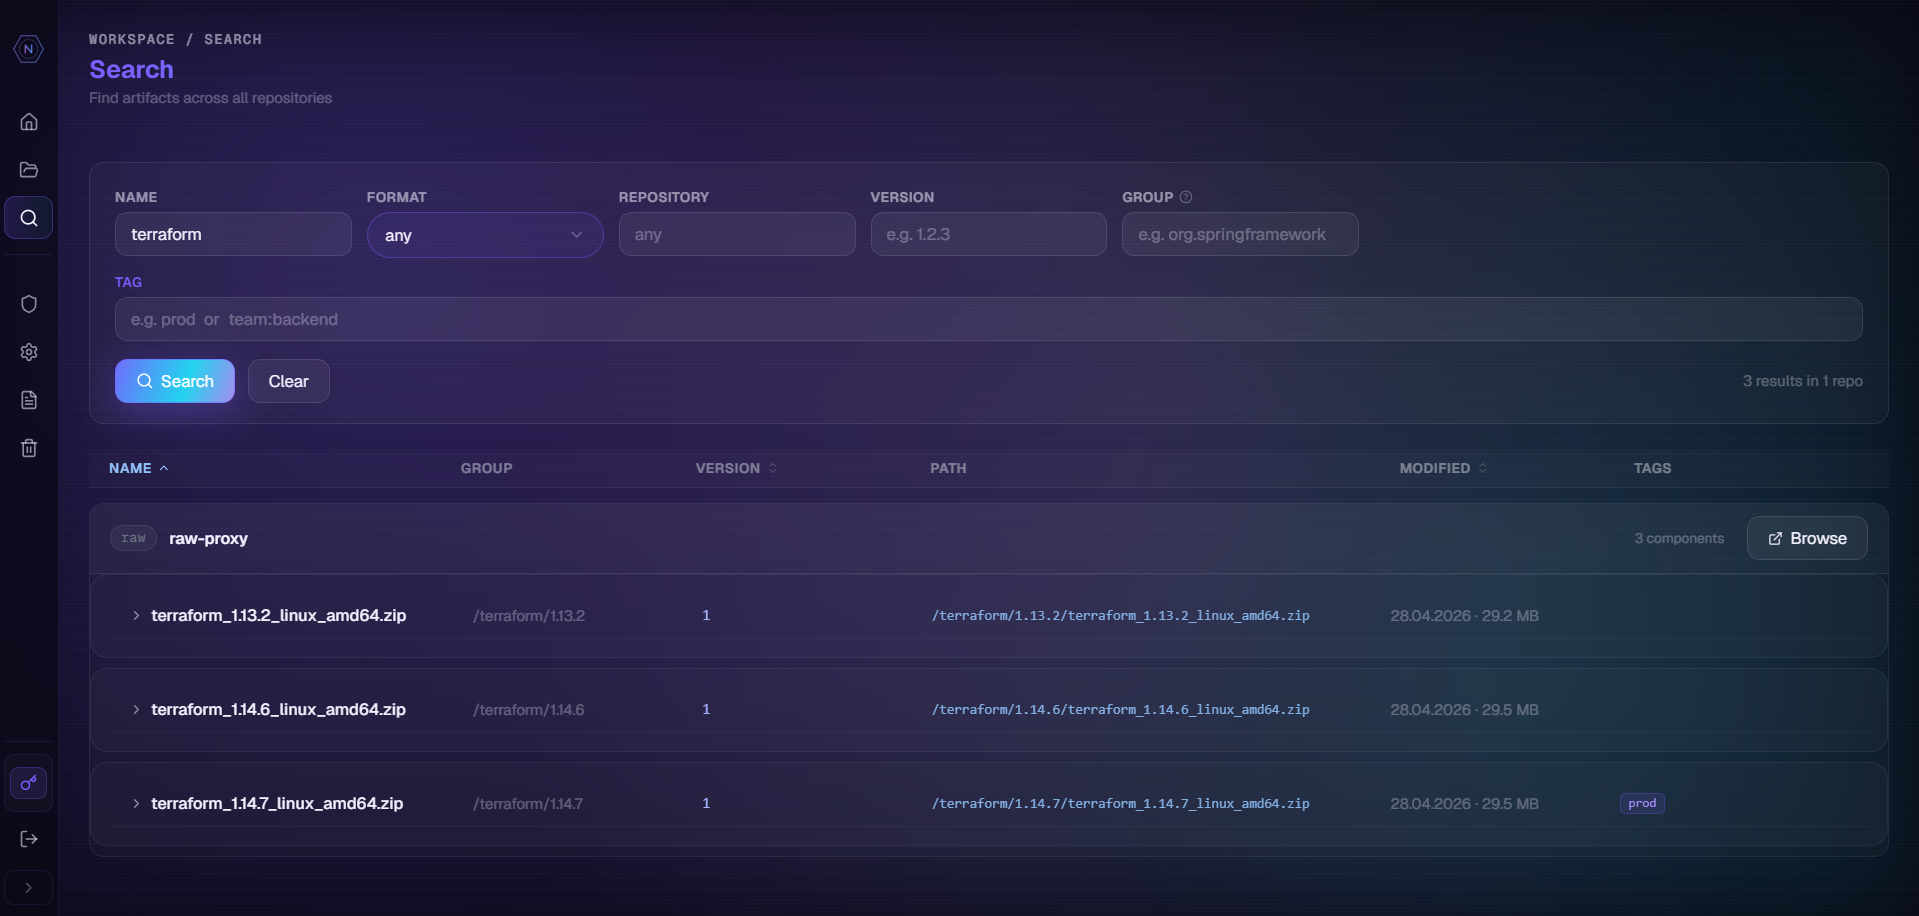
nx-admin role grants full access; custom roles control per-repository access via privileges.config.yaml under the ldap section. Users are provisioned on first login (JIT). Groups map to Nexspence roles via role_mappings.auth.password_min_length.nxs_. Use as Bearer token or as the password in HTTP Basic auth (username = your username, password = token).auth.token_max_days in config.yaml (default 180 days). Tokens are hashed (SHA-256) — the plaintext is never stored.
format, path, repository. Example: format == "maven2" && path.startsWith("/com/example/")repository-content-selector. Create in Admin → Security → Privileges.nx-admin role grants full access to everything.| What it matches | CEL expression |
|---|---|
| All Maven artifacts | format == "maven2" |
| Specific Maven group | format == "maven2" && path.startsWith("/com/example/") |
| All Docker images | format == "docker" |
| Specific repository | repository == "npm-releases" |
| All npm packages | format == "npm" |
| PyPI in specific repo | format == "pypi" && repository == "pypi-releases" |
| Exclude snapshots | format == "maven2" && !path.contains("SNAPSHOT") |
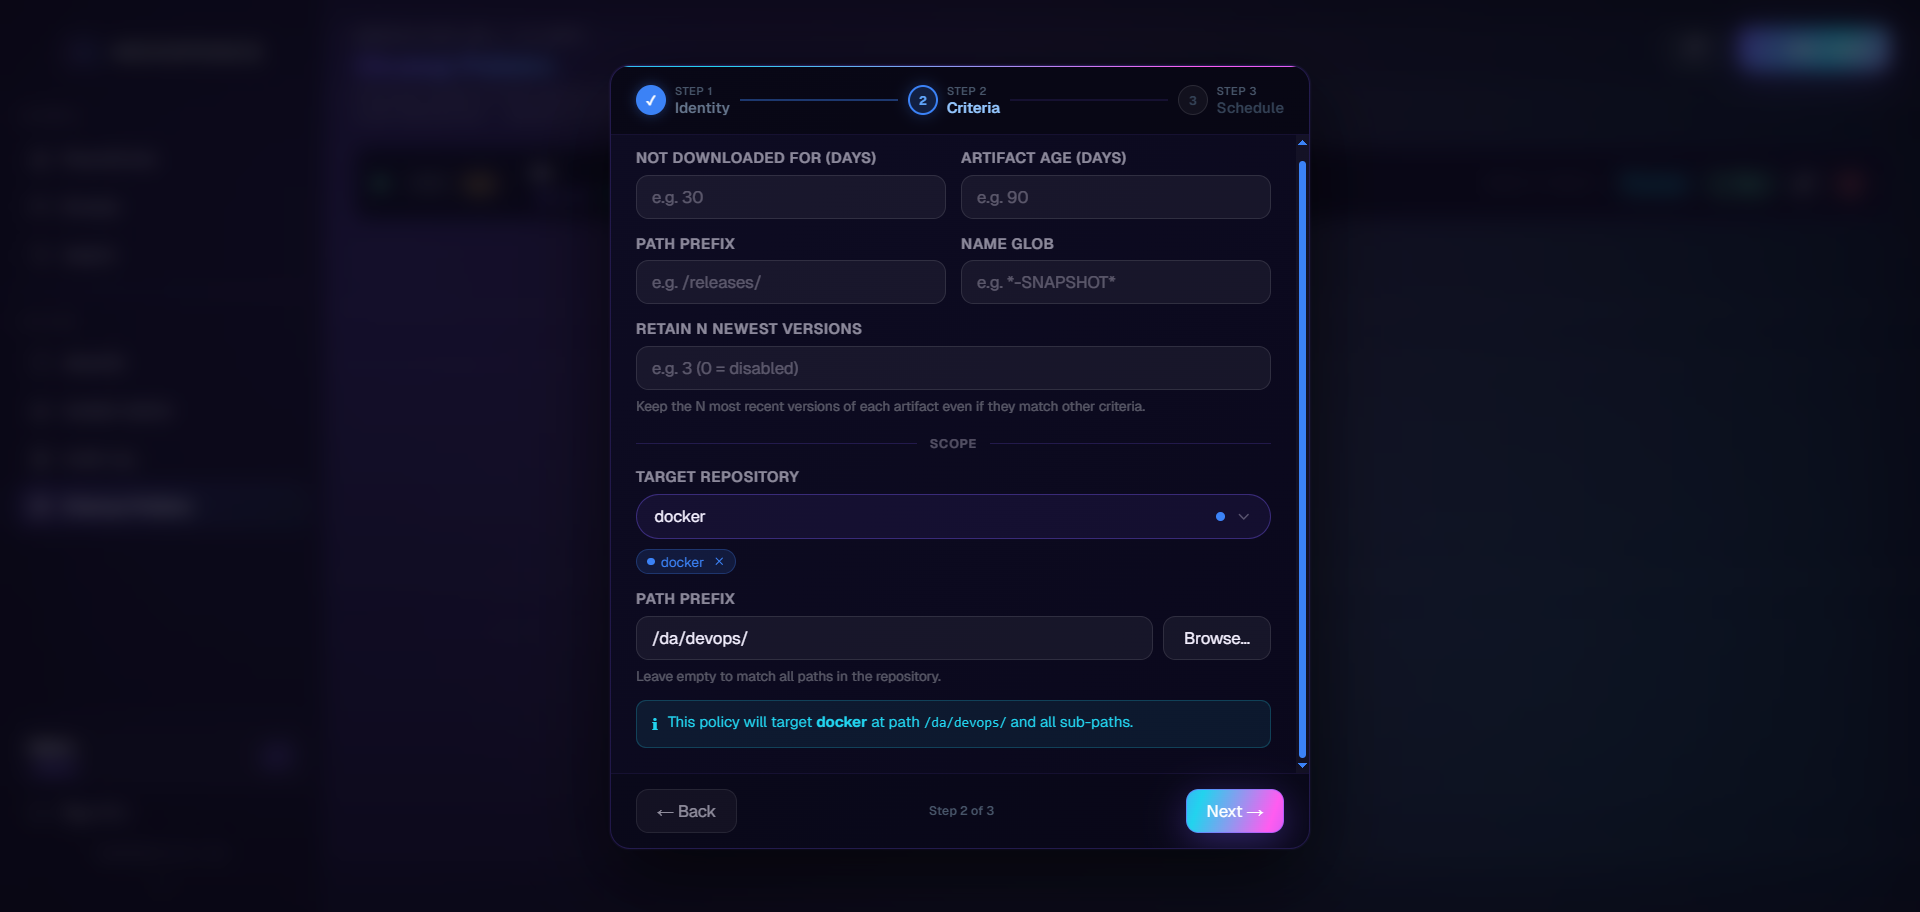
| Criterion | Description |
|---|---|
| Published before | Remove artifacts published more than N days ago. |
| Last downloaded before | Remove artifacts not downloaded in the last N days. |
| Retain N versions | Keep only the N newest versions of each component. All older versions are eligible for removal. On hosted docker/oci repositories a version is a tag; layers and digest aliases are never cleanup candidates. |
* for all formats or a specific one), set criteria, and optionally set a cron schedule.0 2 * * * (2 AM daily).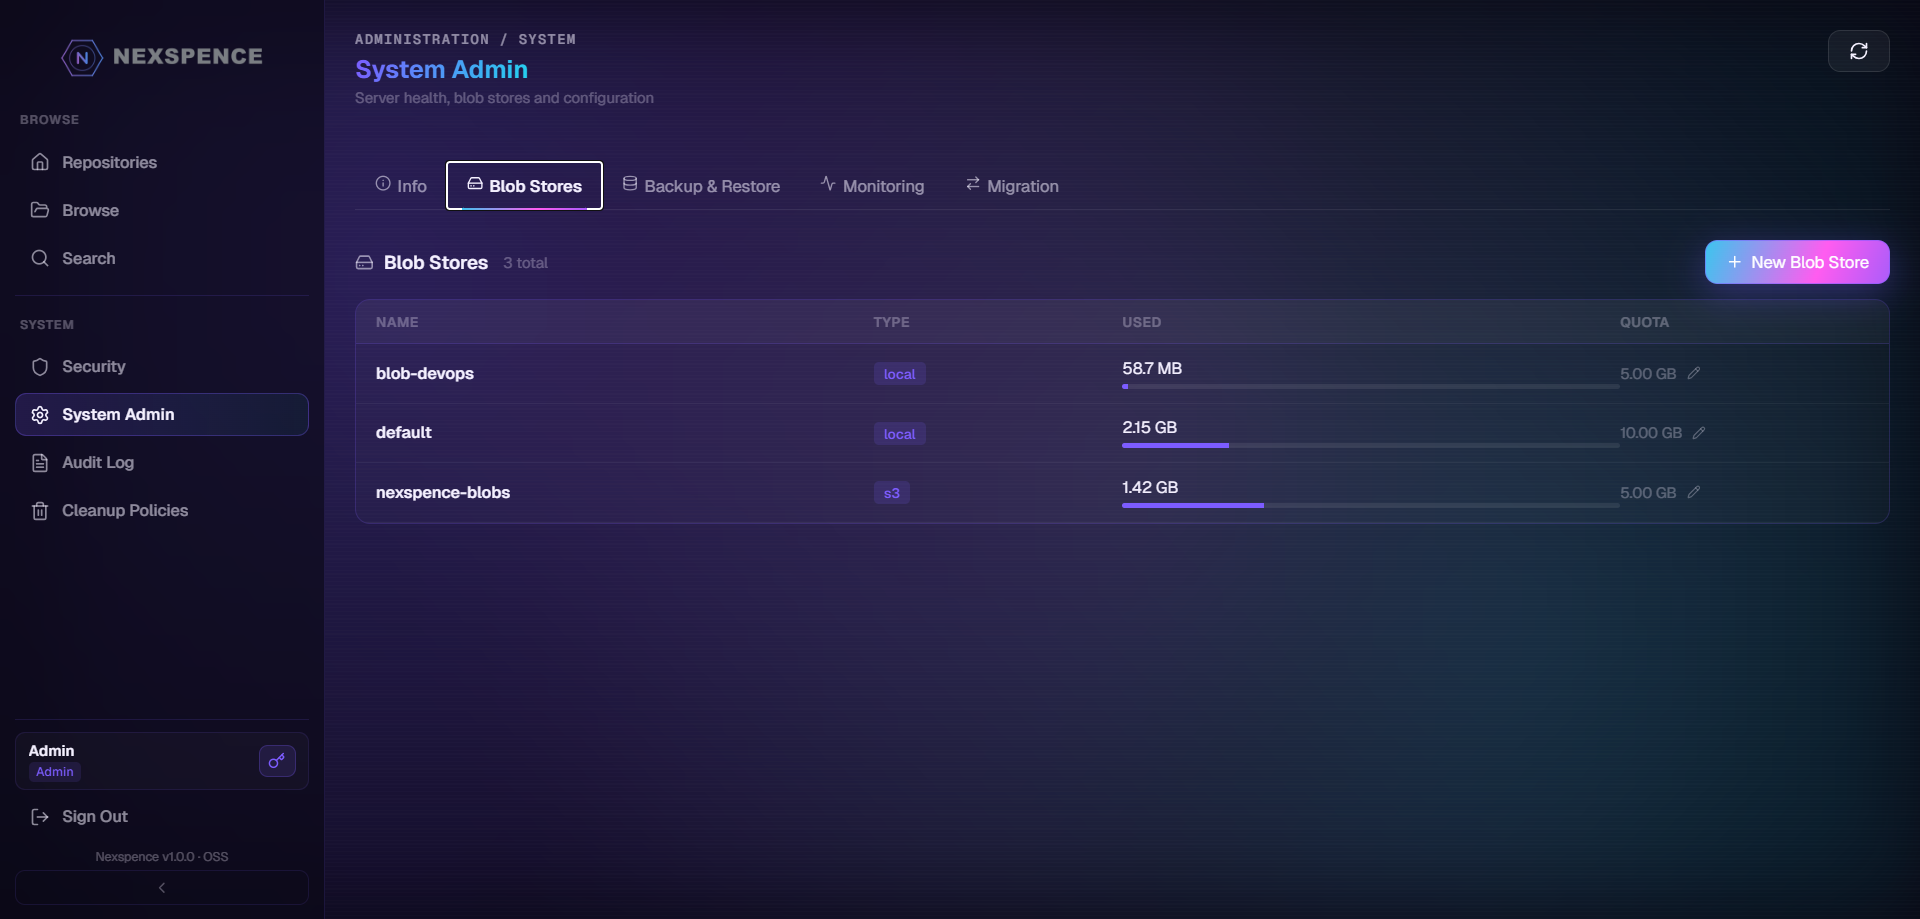
gc.min_age (default 24h) are collected, so an in-flight upload whose asset row is not yet committed is never removed.gc.schedule, weekly by default) sweeps every store automatically.| Event | When |
|---|---|
artifact.published | Artifact pushed to hosted or cached by proxy |
artifact.deleted | Artifact deleted |
repo.created | Repository created |
repo.updated | Repository configuration updated |
repo.deleted | Repository deleted |
proxy.error | Proxy failed to fetch from upstream |
X-Nexspence-Signature header (HMAC-SHA256 of the body). Verify it on your receiver to reject forged requests.| Item | Detail |
|---|---|
| Repositories | Hosted, proxy and group definitions — format, type, group membership, proxy remote URL |
| Artifacts | Every component in each hosted repository, streamed through the same storage path an upload takes |
| Container images | Manifests, image indexes and the blobs they reference — re-created so the image is pullable byte-for-byte |
| Privileges, roles, users | Nexus built-ins skipped; nested roles flattened; local users get a temporary password, external ones no credential |
| Routing rules | ALLOW / BLOCK rules with their regex matchers, stored whole or not at all |
outbound.allowed_internal_cidrs.| Metric | Description |
|---|---|
nexspence_requests_total | Total HTTP requests (by method, path, status) |
nexspence_request_duration_seconds | Request latency histogram (p50, p95, p99) |
nexspence_artifacts_total | Total artifacts stored |
nexspence_bytes_stored_bytes | Total storage used in bytes |
nexspence_downloads_total | Total artifact downloads |
nexspence_artifacts_deleted_total | Total artifacts deleted |
nexspence_goroutines | Active Go goroutines |
nexspence_memory_alloc_bytes | Heap memory in use |
nxs_* token into deploy/monitoring/prometheus-token.docker compose --profile monitoring up -d. Prometheus scrapes /metrics every 10 seconds. The Grafana dashboard loads automatically./metrics shares the listener with the API, so it requires a Bearer token by default — an anonymous scrape publishes install size, artifact and download counts and the Go runtime fingerprint. Since v1.35.0 you can set metrics.public: true (or NEXSPENCE_METRICS_PUBLIC, or --set config.metricsPublic=true in the Helm chart) to serve it without authentication, for deployments whose listener is only reachable from a trusted network. A Prometheus ServiceMonitor then needs no token Secret.The scanner is probed with <bin> --version, which answers three questions at once: is the file there, will it run here, and which version is it. The answer is one of four states, visible in Admin → Security → CVE Scan, at GET /api/v1/security/scanner, and in one log record at startup.
| State | What it means |
|---|---|
disabled | scan.trivy.enabled is false — nexspence has not even looked for a binary. |
missing | Enabled, but there is no file at the configured location and no trivy on PATH. |
broken | A file is there and will not execute: wrong architecture, truncated download, or no execute bit. |
ready | It runs and reported its version — scanning works. |
A scan requested while the scanner is unavailable is refused with that sentence instead of failing obscurely, and automatic scan-on-upload skips image components rather than filling the history with errors. Once scanning is enabled the binary probe re-runs at most once a minute, so supplying or replacing the binary is picked up without a restart — configuration changes, including the switch itself, are read only at startup.
One value switches it on. The chart then adds an initContainer named trivy-copy that copies the binary out of the aquasec/trivy image into a shared emptyDir, and points nexspence at it.
Budget ~150 MB for the shared volume — that is the binary alone. The vulnerability database lives in the cache volume, not this one.
The shipped docker-compose.yml is already wired: a one-shot trivy-init service in the scanning profile fills a named volume that nexspence mounts read-only. You do two things.
Outside a container any normally installed Trivy works — scan.trivy.bin defaults to trivy, resolved through PATH, so a package-manager install is found on its own. Restart nexspence after the config edit.
By default Trivy pulls it from ghcr.io on first use, which is why the first scan takes a minute or two. In an air-gapped network, mirror it into a nexspence repository and point Trivy at the mirror. Mirror both databases: the Java one is fetched separately the first time an image containing Java artifacts is scanned, and an unmirrored one dials ghcr.io and fails.
A docker or oci repository can refuse to serve an image whose latest scan has findings at or above a severity you choose — Harbor's Prevent vulnerable images from running. Off by default; hosted, proxy and group repositories all take it. Set Refuse pulls at severity in the repository settings, or formatConfig.pull_block_severity over the API: low, medium, high, critical or malicious. A threshold blocks its own severity and every one above it; malicious ranks above critical (a malicious-package report has no CVSS level), and unknown/negligible findings never block. A refused GET or HEAD of a manifest answers 403 with an OCI DENIED error naming the severity found and the threshold.
| Repository | No finished scan | Finding at or above the threshold |
|---|---|---|
hosted | Refused — serving it would read as a clean pull | Refused |
proxy | Served — the first pull brings the image in to be scanned | Refused |
group | Decided by the member that answers: refused from hosted, served from proxy | Refused |
A failed scan counts as no scan. For a pull by digest the newest scan of that manifest or of any tag resolving to it decides; a platform manifest of a multi-arch image without a scan of its own is judged by the tagged index that lists it. A member's gate holds inside every group — its refusal is relayed, the group does not try the next member — and a group's own gate applies to whatever member answers; when both carry one, the stricter wins. A scan counts only while the tag still holds the manifest it scanned: a tag re-pushed with other content is unscanned until it is scanned again. Signatures, SBOMs and other non-image artifacts are not refused for being unscanned. The scanner's own pulls (as bootstrap.admin_username) pass the gate, or a hosted image could never be scanned.
broken state. When in doubt, copy the binary out of the aquasec/trivy image, which is known to run there as uid 1000. Full reference, including every configuration key: docs/scanning.md.docker pull. Blobs the target already holds are skipped. If any referenced blob is missing from the source, the promotion is refused and nothing is copied. The rule's path filter, scan gate and approval apply to the tag you promote, not to each blob."scan_fail_severities": ["critical", "medium"]; omit the field or send an empty list for the default."auto_promote": true) and a client upload into the rule's source — a hosted repository — starts the rule by itself, with no Browse click or API call. It waits until the component has gone 30 seconds without a new file, so a Maven jar, pom and sources deploy moves once; a file uploaded later follows by itself, and only what the target lacks is copied. The path filter, the scan gate (it waits up to an hour for a scan of this upload), the target's write policy and approval still apply: with manual approval one pending request appears, and Approve copies it. Anything blocked shows up in the requests list as a failed request marked Auto, with the reason, and in the audit log. For Docker and OCI, a tag push starts the rule and promotes the whole image; layer uploads do not. A promoted copy does not start rules on the target repository, so promotions do not chain. Timings: promotion.auto_settle_window, promotion.auto_scan_wait, promotion.auto_poll_interval. A scan that errored blocks an automatic promotion (a manual Promote still passes it, since a reviewer is looking), and a rule requiring a scan for a format no scanner covers is blocked at once. Approving an automatic request needs a scan of the component as it is now; if it was published again, the new upload is checked first, and a blocked re-upload fails the pending request. maven-metadata.xml and checksum files are never promoted — the target builds its own metadata.nexspence/nexspence.Declare the provider, point it at your Nexspence server, and define resources. Run terraform init, then terraform apply.
Authenticate with an nxs_* API token (preferred) or username + password. Set credentials in the provider block or via environment variables.
nxs_* token in Security → API Tokens and pass it via the token argument or NEXSPENCE_TOKEN. Never commit secrets to version control — use a Terraform variable or a secrets manager.terraform import.| Name | Manages |
|---|---|
nexspence_repository | Hosted, proxy, and group repositories for any format |
nexspence_blobstore | Local or S3-compatible blob stores |
nexspence_content_selector | CEL content selectors |
nexspence_privilege | Content-selector privileges |
nexspence_role | Roles grouping privileges together |
nexspence_user | User accounts and their role assignments |
nexspence_cleanup_policy | Scheduled cleanup policies (age / downloads / retain N) |
nexspence_routing_rule | ALLOW/BLOCK path routing rules |
nexspence_webhook | Outbound event webhooks (HMAC-signed) |
nexspence_promotion_rule | Build-promotion rules (scan gate / manual approval) |
| Name | Returns |
|---|---|
nexspence_repository | Look up a single existing repository |
nexspence_repositories | List all repositories, optionally filtered by format or type |
deploy/terraform-example/. You can define local or S3 blob stores as code, too.Define local or S3-compatible blob stores. The S3 endpoint is dialed by the Nexspence server, so use an address the server can reach (e.g. an in-network hostname) — not your workstation's localhost.
To hack on the provider itself, point Terraform at your locally built binary with a dev override in ~/.terraformrc.
auth.jwt_secret is the shipped dev default, or if bootstrap.admin_password is still admin123. Production must set a real 32+ character jwt_secret and a strong admin password. To boot anyway for local development only, set auth.allow_insecure_defaults: true.The dev Docker Compose stack sets NEXSPENCE_AUTH_ALLOW_INSECURE_DEFAULTS=true so the quick-start still boots out of the box — never use that override in production.
Never commit real secrets to config.yaml. Inject them through environment variables instead — they override the matching config keys at startup.
tokens_valid_after cutoff. It is bumped whenever the user is disabled, changes or resets their password, or has their roles changed. Any JWT issued before the cutoff is rejected immediately — no waiting for the 24-hour expiry window.169.254.169.254). This prevents a misconfigured or malicious URL from probing your internal network.| Control | Detail |
|---|---|
| Security headers | Every response carries X-Content-Type-Options: nosniff, X-Frame-Options: DENY, and Referrer-Policy: no-referrer. |
| CORS allow-list | Restrict cross-origin callers via http.cors_origins. An empty list is the wildcard dev default. |
| Body size limit | http.max_body_mb rejects oversized bodies with 413. Artifact and upload routes are exempt so large packages still flow. |
| Timeouts & TLS | ReadHeaderTimeout guards against slow-loris; when TLS is enabled the minimum version is TLS 1.2. |
Opt-in per-IP / per-user throttling. Disabled by default — enable it with auth.rate_limit_enabled: true and tune rate_limit_rps / rate_limit_burst.
readOnlyRootFilesystem, drops all capabilities, and sets allowPrivilegeEscalation: false.| Area | Detail |
|---|---|
| Dependency scanning | CI runs govulncheck as a blocking gate; Dependabot keeps dependencies current. |
| Release artifacts | Releases publish an SBOM and build provenance, and the image is scanned with Trivy. |
| Pinned Actions | All GitHub Actions are pinned to commit SHAs to prevent tag-hijack supply-chain attacks. |
Any local user — administrators included — can rotate their own password without help. The current password is always required on this route, whatever the caller’s role. Changing the password bumps the JWT cutoff, so every browser session is invalidated; API tokens are separate credentials and keep working.
| Format | Protocol | Hosted | Proxy | Group |
|---|---|---|---|---|
| Maven 2/3 | Maven HTTP | ✓ | ✓ | ✓ |
| npm | npm registry v1 | ✓ | ✓ | ✓ |
| PyPI | Simple index + twine | ✓ | ✓ | ✓ |
| Docker | OCI Distribution v2 | ✓ | ✓ | ✓ |
| OCI artifacts | OCI Distribution v2 | ✓ | ✓ | ✓ |
| Go Modules | GOPROXY v2 | ✓ | ✓ | ✓ |
| NuGet | v2 OData + v3 flat | ✓ | ✓ | ✓ |
| Helm | chart index.yaml | ✓ | ✓ | ✓ |
| Cargo | Sparse index | ✓ | ✓ | ✓ |
| Apt | Debian Packages index | ✓ | ✓ | ✓ |
| Yum / RPM | repomd.xml | ✓ | ✓ | ✓ |
| Conan | Conan v1 + v2 revisions | ✓ | ✓ | ✓ |
| Raw | HTTP PUT/GET | ✓ | ✓ | ✓ |
| Conda | conda index | ✓ | ✓ | ✓ |
| Terraform | Registry protocol v1 | ✓ | ✓ | ✓ |
| RubyGems | Compact index | ✓ | ✓ | — |
| CRAN | PACKAGES index | ✓ | ✓ | ✓ |
| Alpine (apk) | APKINDEX | ✓ | ✓ | ✓ |
| Hugging Face | Hub API + resolve | ✓ | ✓ | ✓ |
| Base Path | Purpose |
|---|---|
/service/rest/v1/ | Nexus OSS v1 REST API — 100% compatible, drop-in for existing pipelines |
/service/rest/beta/ | Nexus beta endpoints — partial support |
/api/v1/ | Native Nexspence API — migration, extended system info, monitoring |
/repository/:name/* | Artifact protocol endpoints (Maven, npm, Docker, etc.) |
/v2/ | Docker OCI Distribution Spec v2 |
docs/api-spec.yaml.POST /api/v1/auth/login), API tokens (nxs_* prefix via Bearer or Basic password), or HTTP Basic with username + password.